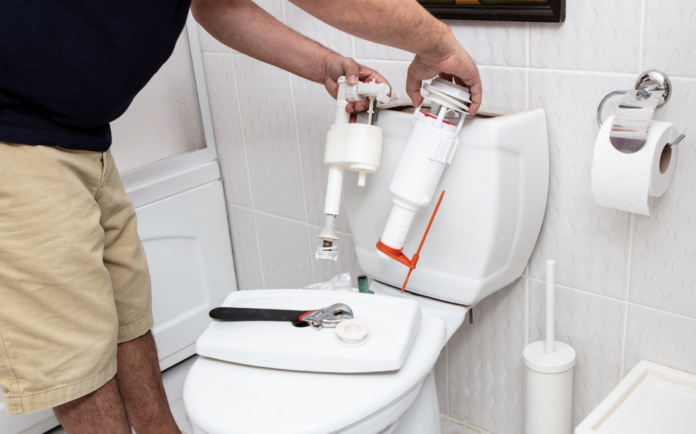
Did you know your toilet is the main source of water use in your home? It accounts for nearly 30 percent of the average home’s overall consumption.
That’s why it’s important to have a toilet in working order. When repairs or a replacement needs to happen, it can have a big impact on your water bill and overall usage. If you notice a major difference in your water bill from month to month, it might be time to consider a replacement.
Read on to learn everything you need to know about toilet replacement.
What Tools Do You Need?
Before you begin your installation, there are a few tools you’ll need to gather:
- Tongue-and-groove pliers
- Adjustable wrench
- Hacksaw blade
- Putty knife
- Two-foot level
- Toilet shims
- Wax rings
- Silicone caulk
- Bucket
- Large sponge
- Old towels
You’ll also, of course, need your new toilet.
The Removal Process
To start, you’re going to remove your toilet. This might sound self-explanatory, but there are a few steps you need to take first.
Drain the Toilet
First, you’ll need to drain the toilet.
Start by turning the water supply valve clockwise until it stops to turn it off. Flush the toilet to empty the tank, and then remove the lid. Grab your large sponge and bucket to soak up the rest of the water that’s now in the bowl and tank.
Remove the Mounting Nuts
Once everything is dry, it’s time to disconnect the water supply tube with those tongue-and-groove pliers. Remove the porcelain or plastic caps over the floor bolts, grab your adjustable wrench, and then remove the nuts and bolts as well.
If you find that the nuts are rusted, it’s best to simply grab a hacksaw blade and cut below them to make removal easier.
Pull Toilet Out
From there, you (and a partner) can simply lift the toilet up to remove it. Lay the toilet on its side or back — ensuring the tank and bowl are both supported — using those old towels or even an old rug to help protect your floor.
Also, make sure you inspect the flange to ensure it isn’t damaged. If it is, make sure you replace or repair it.
You’ll also need to take your putty knife and remove any old wax from both the toilet and floor.
The Installation Process
Once your toilet is out, it’s time to install your new one! If the removal process sounded like too much, though, click here to learn more about how professionals can help you out with the entire thing.
Test Fit Your New Toilet
The first thing you should do with your new toilet is ensuring it fits the base. You’ll be able to tell because the bolts will align with the holes in the toilet’s base. Also, use the level to ensure everything sits evenly on the base.
If necessary, use shims to level the entire toilet.
Once you’ve ensured it fits, remove and gently set it aside.
Apply the Wax Ring
Now, it’s time to place your new wax ring over the horn. Press down firmly to ensure it’s well-fitted, and then be careful to not touch it anymore. If the ring touches the floor at any time before the final installation, it’ll need to be replaced.
If you want a reusable option, you can turn to a foam gasket. That means you can move and reset your toilet without having to worry about replacing the ring.
Set Your Toilet
Place your flange bolts into their respective slots with the thread ends pointing straight up. From here, carefully lift your toilet back up and set it onto the closet flange. Push the toilet down with a gentle rocking pressure until you’re sure that it’s firmly seated against the floor.
Tighten the Nuts
Once you’re sure everything is in place, install the washer and nut onto each bolt. Tighten gradually by alternating each side to ensure the toilet is set evenly. Be careful to overtighten your bolts, though, or you run the risk of cracking the base. Once everything is tightened, slide the plastic caps over the bolts.
If your toilet was separated, now is when you’ll install the toilet tank onto the base. If this was the case, you’ll need to place the flush valve gasket around the center opening, and then secure the mounting bolts through the inside of the tank. Once that’s done, place the tank on the bowl while making sure you slid the mounting bolts through the holes.
Finally, add and tighten the nuts and washers until everything is secured. Keep the same alternating principle in mind with this step as well.
Finish up
Once everything is set up, all you have to do is connect the water supply tube to the fill valve, and then gently tighten it up with pliers. Open the shutoff valve by turning counterclockwise and allowing both the bowl and toilet tank to fill up. Flush the toilet as a test.
While you’re doing this, watch for leaks and ensure everything is set up properly.
If you’d like, you can use silicone caulk to seal around the base of the toilet, though it’s not necessary.
Ready to Get Started With Your Toilet Replacement?
Are you ready to get started with your toilet replacement? No matter your experience level, you can accomplish this home task on your own. If you feel uncomfortable, though, you can always turn to the experts.
Finding a contractor you trust is important for this process, though, so conduct your search carefully before you commit.
For more on the latest in home, check out the rest of our website.


